How to Master the Salvage Activity in Destiny 2
Salvage activity on Titan offers thrilling six-player chaos and Taken-themed rewards for Destiny 2 veterans and newcomers alike.
I remember diving into the Salvage activity on Titan like it was yesterday. The matchmade chaos, the murky depths, the frantic rush to defuse explosives—this six-player activity is a thrilling test of coordination and firepower. Whether you’re a seasoned veteran or a fresh recruit, mastering Salvage can net you some fantastic Taken-themed weaponry and a heap of seasonal reputation. In this guide, I’ll walk you through every job, the underwater descent, and the final showdown with Azshradat so you can farm efficiently and look cool doing it.
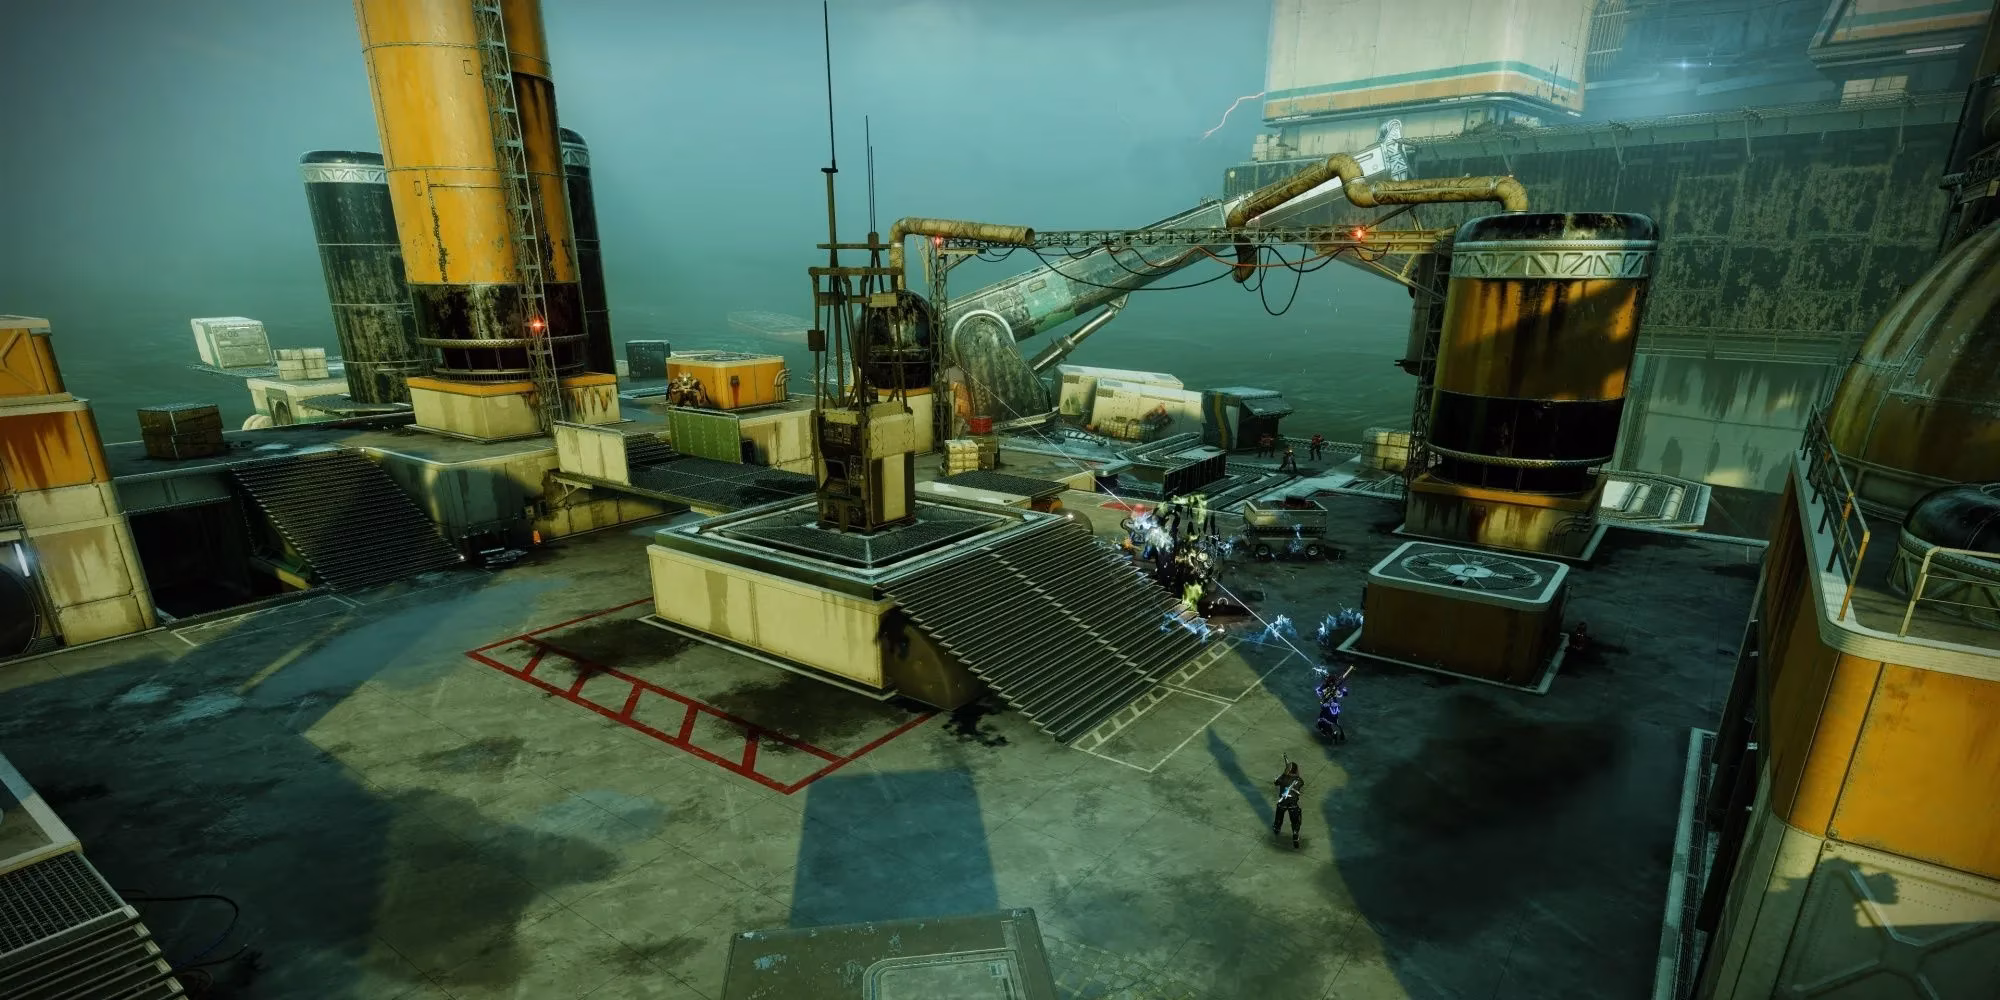
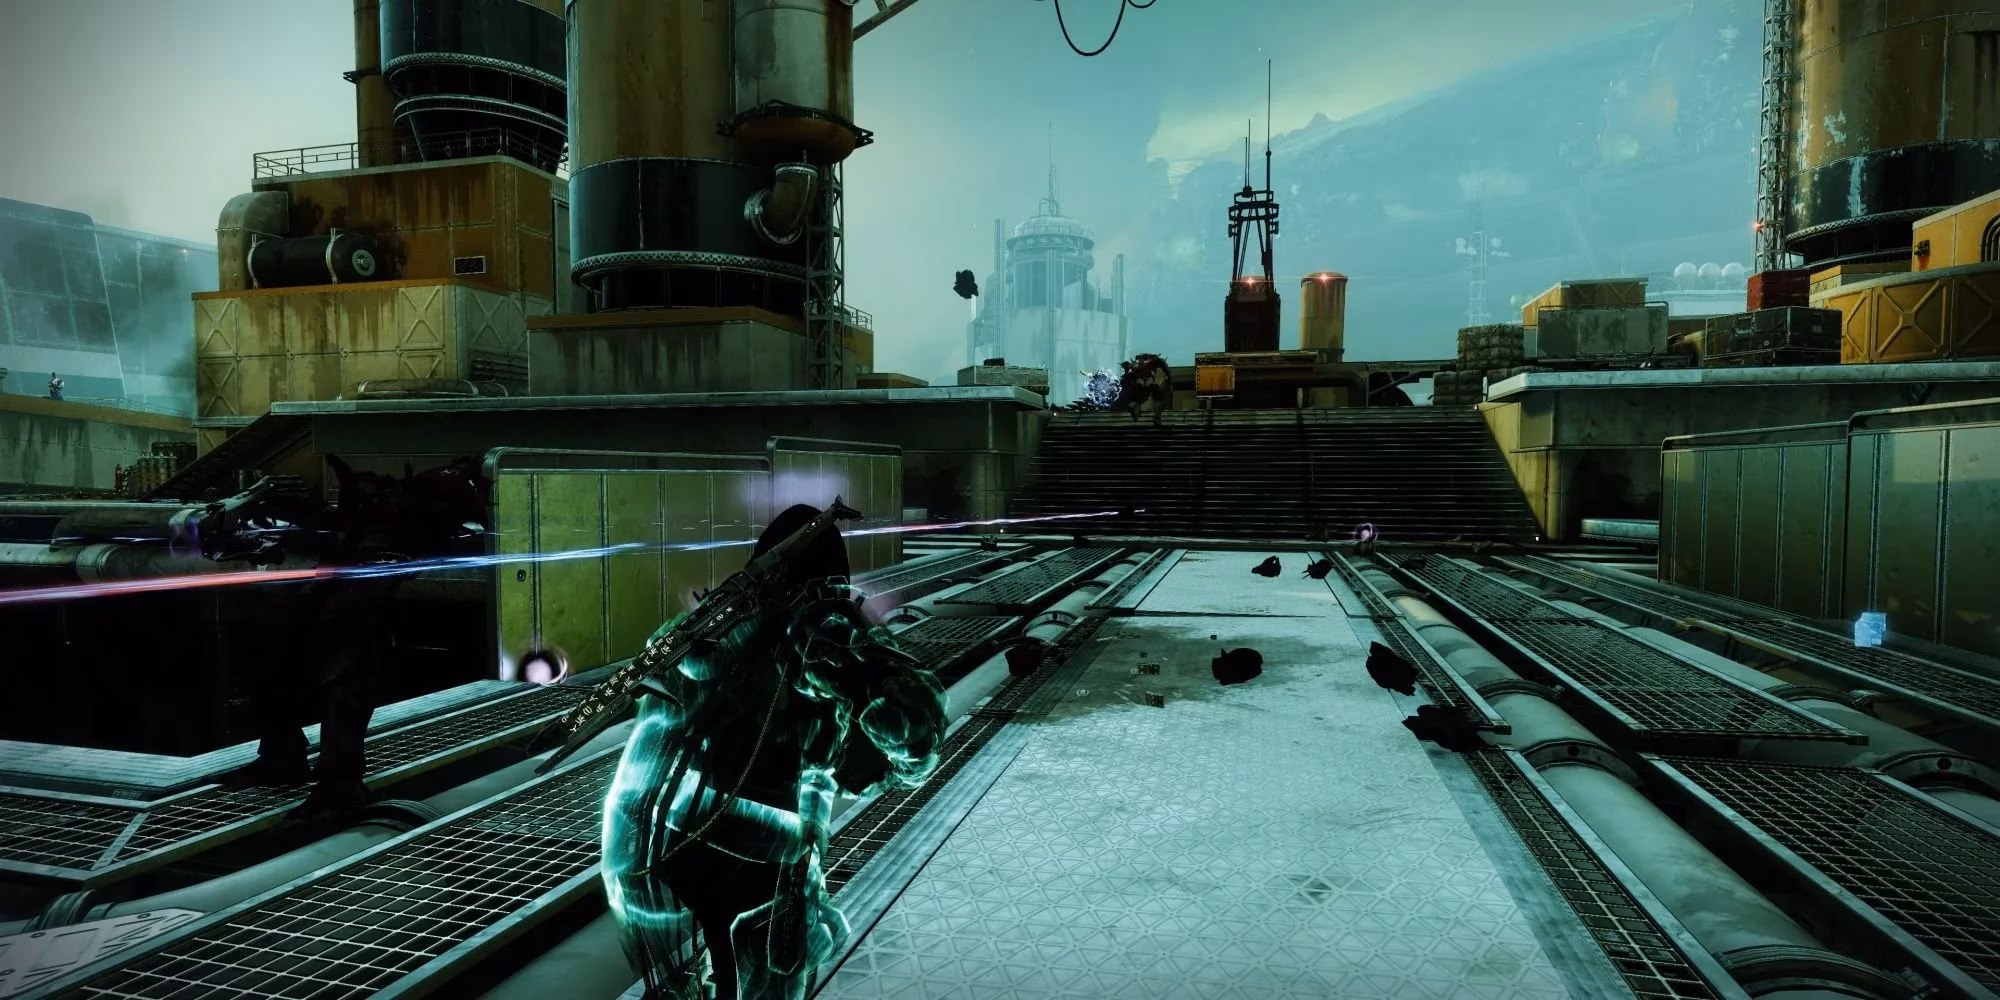
Getting the Lay of the Rig
Salvage is a callback to the classic six-player loop of activities like the Sundial or Menagerie. Your fireteam must complete three randomly chosen tasks from a pool of five before descending into Titan’s ocean to fight a boss. There are no Champions present, which means you’re free to experiment with any loadout that feels good. I personally lean heavily on Strand—its crowd‑control abilities are priceless here, given the dense waves of Hive and Fallen we face. The activity also features rotating elemental Surges and Threats that amplify incoming and outgoing damage, so keep an eye on the modifiers before launching and adjust your subclass and weapons accordingly. Expect a mix of short, intense defense jobs and more puzzle‑like objectives, all set on the weathered rigs of the New Pacific Arcology.
The Five Random Jobs
Once you clear the initial Hive skirmish, Drifter or Sloane will bark out your assignment. Every run throws a different combination at you, which keeps the experience from going stale. Here’s how to crush each one.
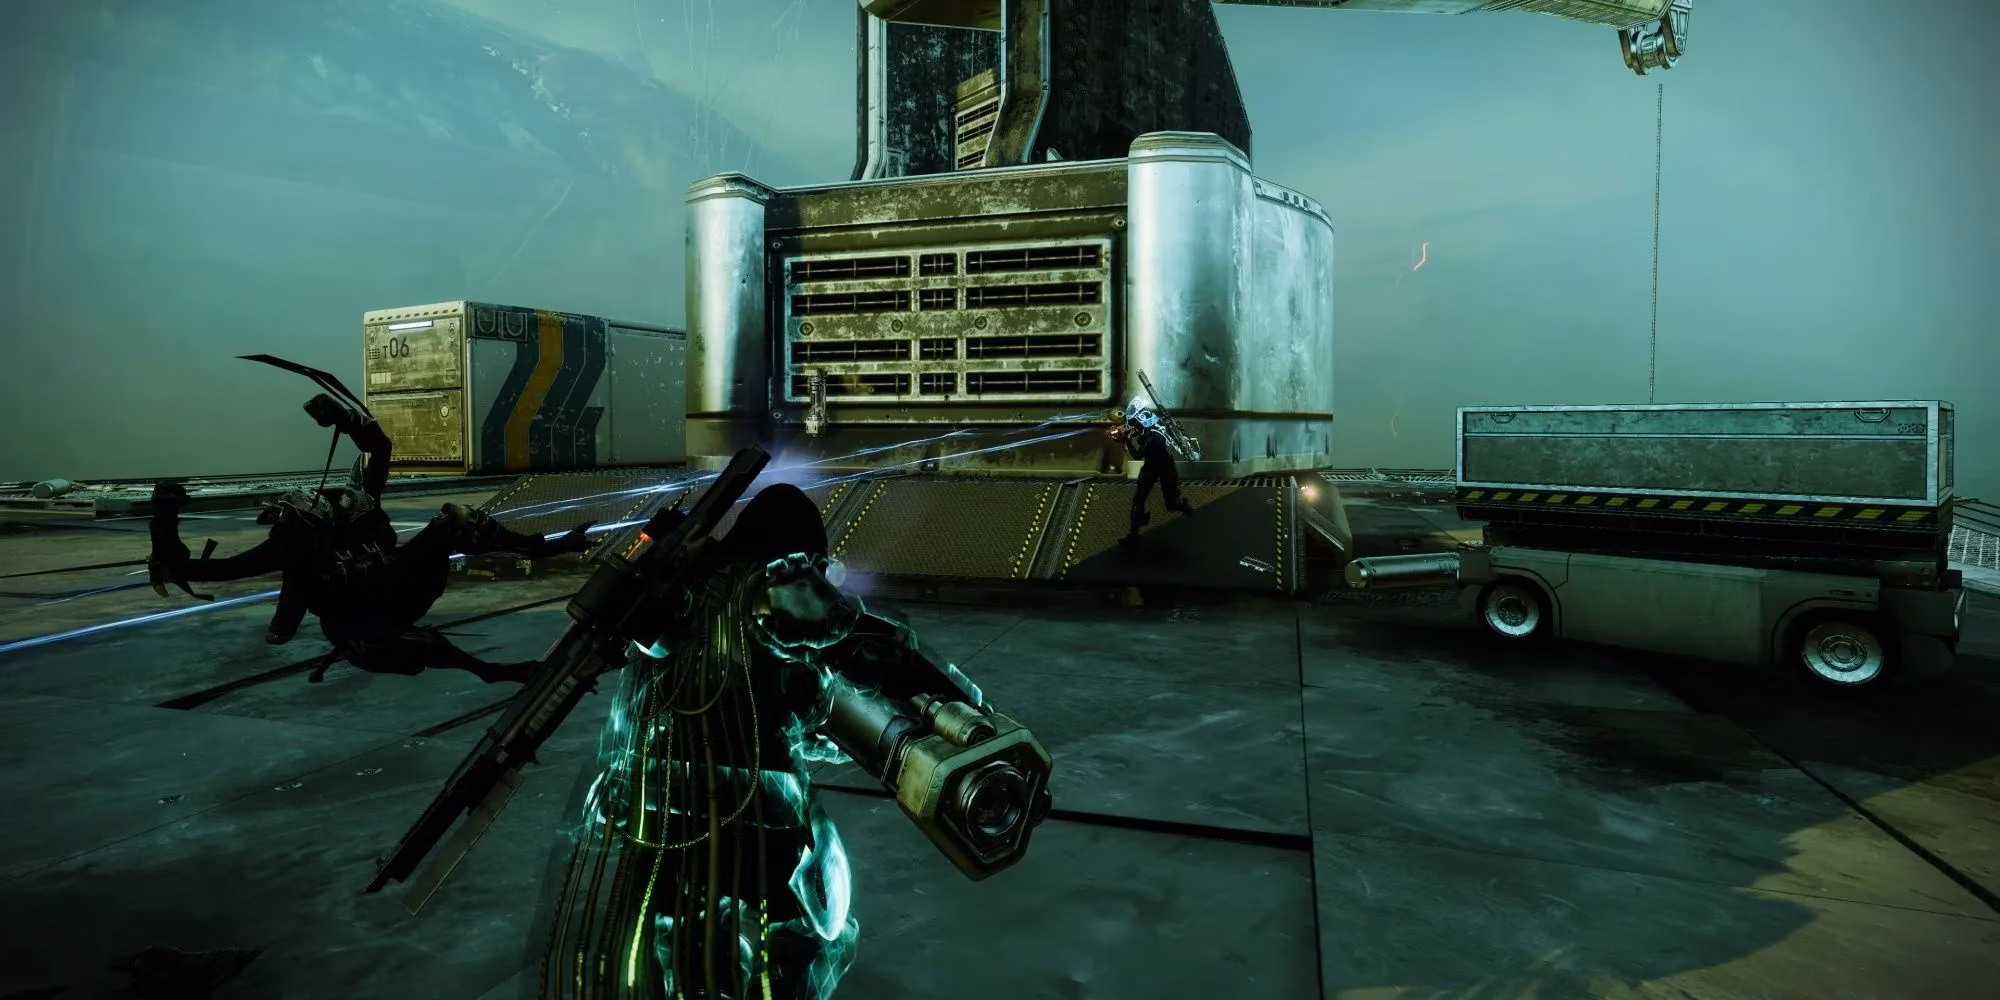
1. 🛡️ Site Security
The rig is dotted with three salvage caches, each marked by a shield icon on your HUD. Hive ships will drop waves of enemies that charge straight for these points. The diamond around each icon acts as a health bar for that cache; if any reaches zero, the activity timer takes a huge hit. Lose all three and you’ll fail the objective outright. Splitting the team into three pairs to cover every site is the brain‑dead simple way to succeed. Pay attention to the spawn ships—they tell you exactly where the next rush is coming from. Stand your ground, throw grenades into the thick of the Taken, and this job usually finishes itself in a couple of minutes.
2. ⚔️ Site Reliability
A Hive ritual portal hums in the center of the area, and the enemy is hell‑bent on sacrificing themselves into it. Your job is to guard the portal from a relentless trickle of Thrall and Cursed Thrall. Those little screamers ignore you entirely and bolt straight for the portal the moment they materialize; a single Cursed Thrall explosion can wipe half the portal’s integrity, so prioritize them above all else. The rest of the Hive will still shoot at you, but the whole fireteam can cluster near the portal and hold the line. Bring an auto‑rifle or SMG for the quick mop‑up, and don’t be shy about using your Super to create a safe zone. Stay alive, keep your eyes on the Thrall lanes, and the ritual will be disrupted before you know it.
3. 💎 Ordnance Disposal (Ritual Crystals & Wizards)
This one comes in two distinct phases. First, defeat the Taken Ogres that lumber onto the rig. Each Ogre drops a specialized weapon that can shatter the ritual crystals scattered around the area. You’ll need roughly three or four of these pick‑ups to destroy every crystal, so splitting up to hunt multiple Ogres at once speeds things up dramatically. Once the last crystal shatters, a pack of Ritual Wizards will spawn. These Wizards are surprisingly tough—bloated with arcane shields and high health pools. Don’t be stingy with your Heavy ammo or Supers here. Melt them fast, and the job is done. Coordination matters: call out which crystals you’re targeting so your teammates don’t waste their limited anti‑crystal weapons.
4. ⚙️ Engineering
Engineering is easily the most relaxed of the five tasks. Drifter or Sloane will announce that a crucial piece of machinery is down, and several crane fuses will appear on your HUD. Pick up a fuse and carry it to the broken component marked by a waypoint. The fuse acts like a small payload—you can’t sprint or use abilities while holding it, but you can traverse the arena at a leisurely jog. Repeat the process a handful of times, and the encounter ends. Because there’s no time pressure beyond the activity’s overall countdown, you can take a moment to restock ammo or reposition before each delivery. Still, keep an eye out for stray enemies that might plink at you while you’re defenseless.
5. 💥 Ordnance Disposal (Disarm Fallen Explosives)
Fallen Skiffs will start scattering volatile devices all over the rig. Each explosive appears as a waypoint on your HUD; reach it and interact to disarm it. Every successful disarm adds five seconds to the activity timer, but if a device detonates, you lose ten seconds. The stakes are small at first, but a string of missed bombs can quickly eat your buffer. About a dozen devices need disarming before the job finishes. Spread out to cover different spawn points and prioritize bombs that are ticking down audibly. You can ignore most enemies while disarming, but a well‑placed grenade or blinding GL round can buy you the breathing room you need. This task epitomizes the controlled chaos of Salvage, and it always gets my pulse racing.
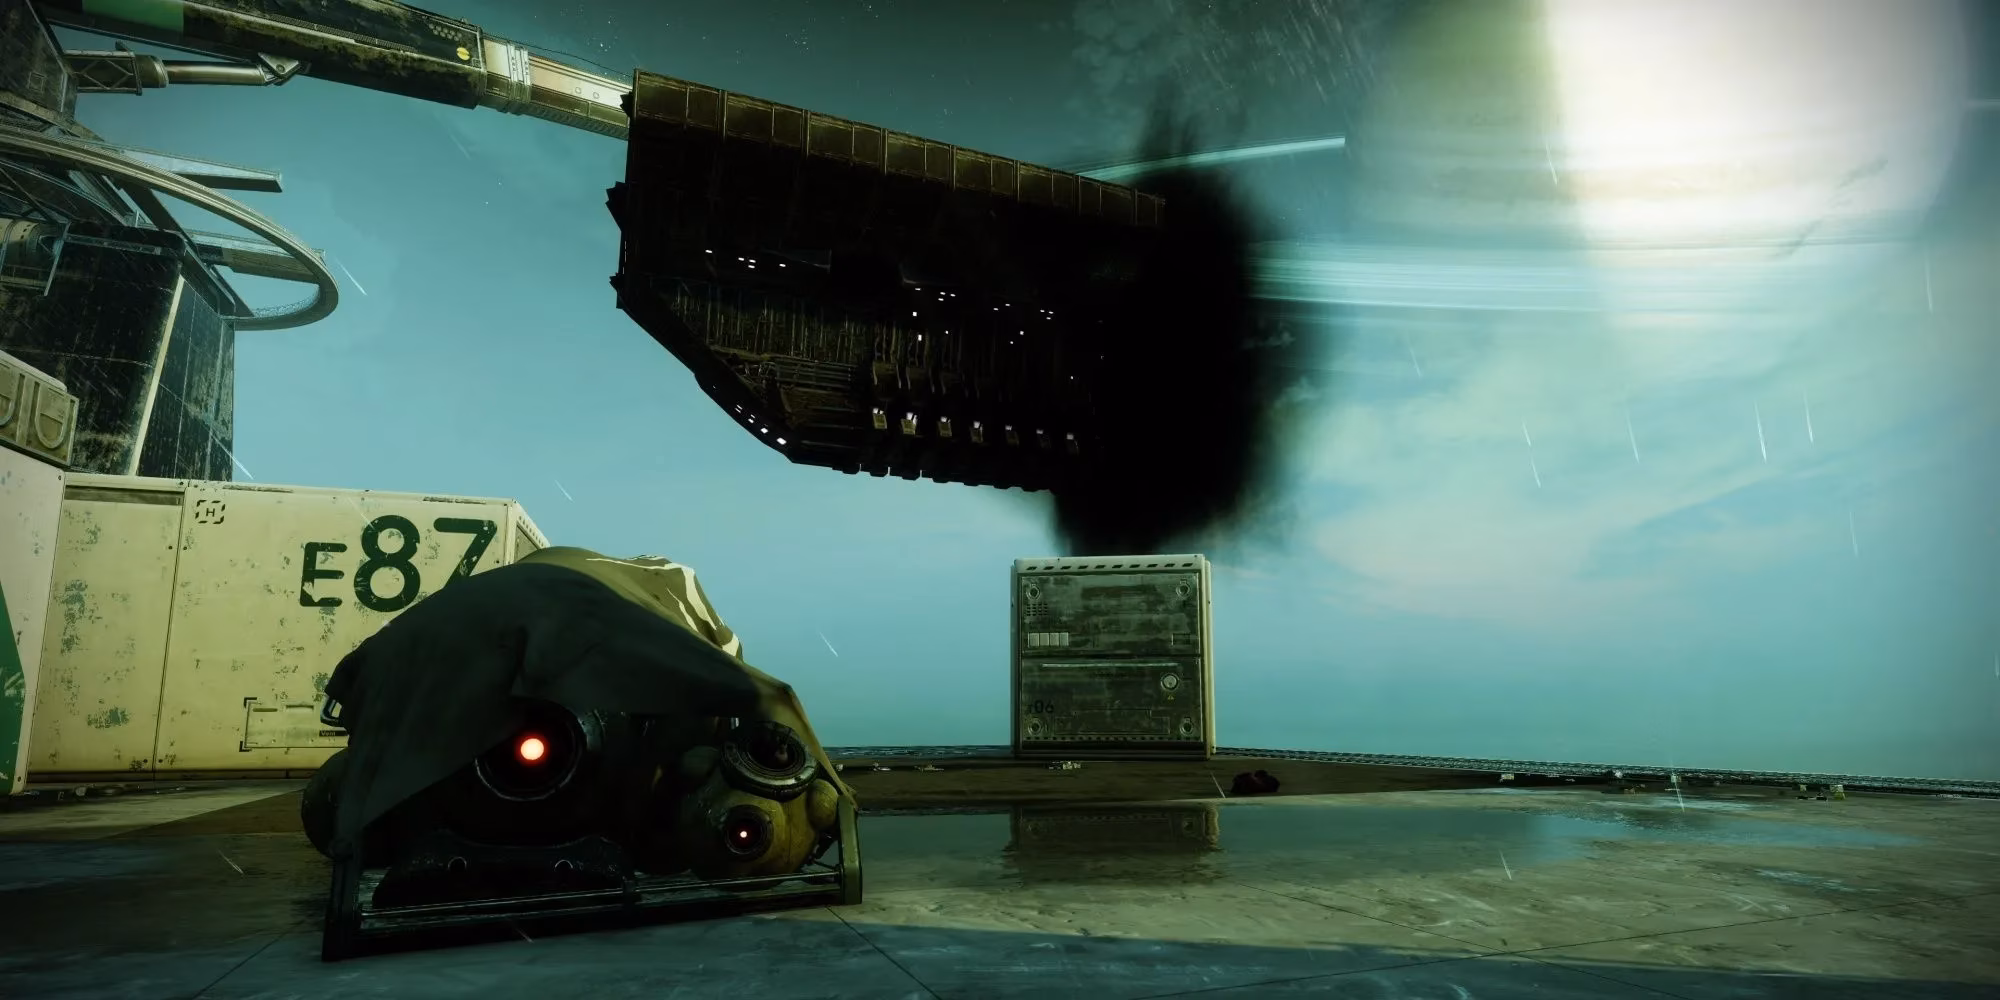
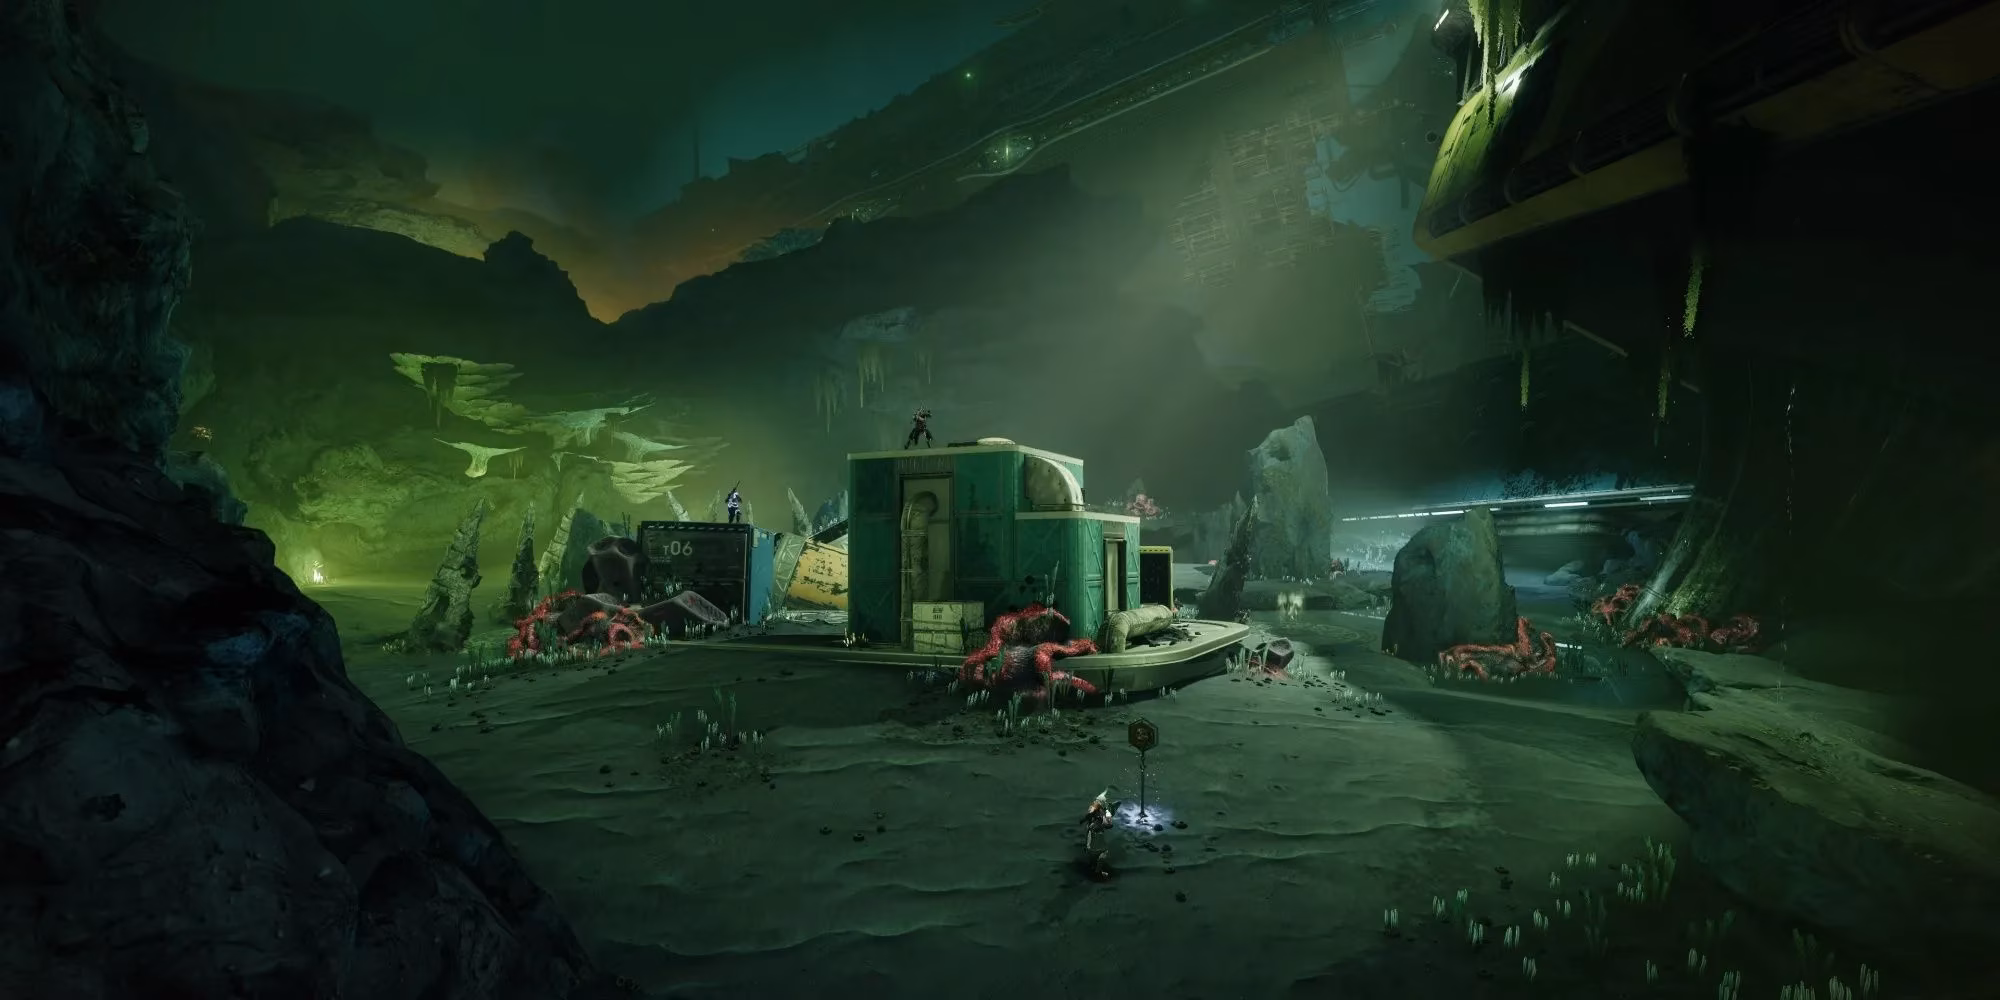
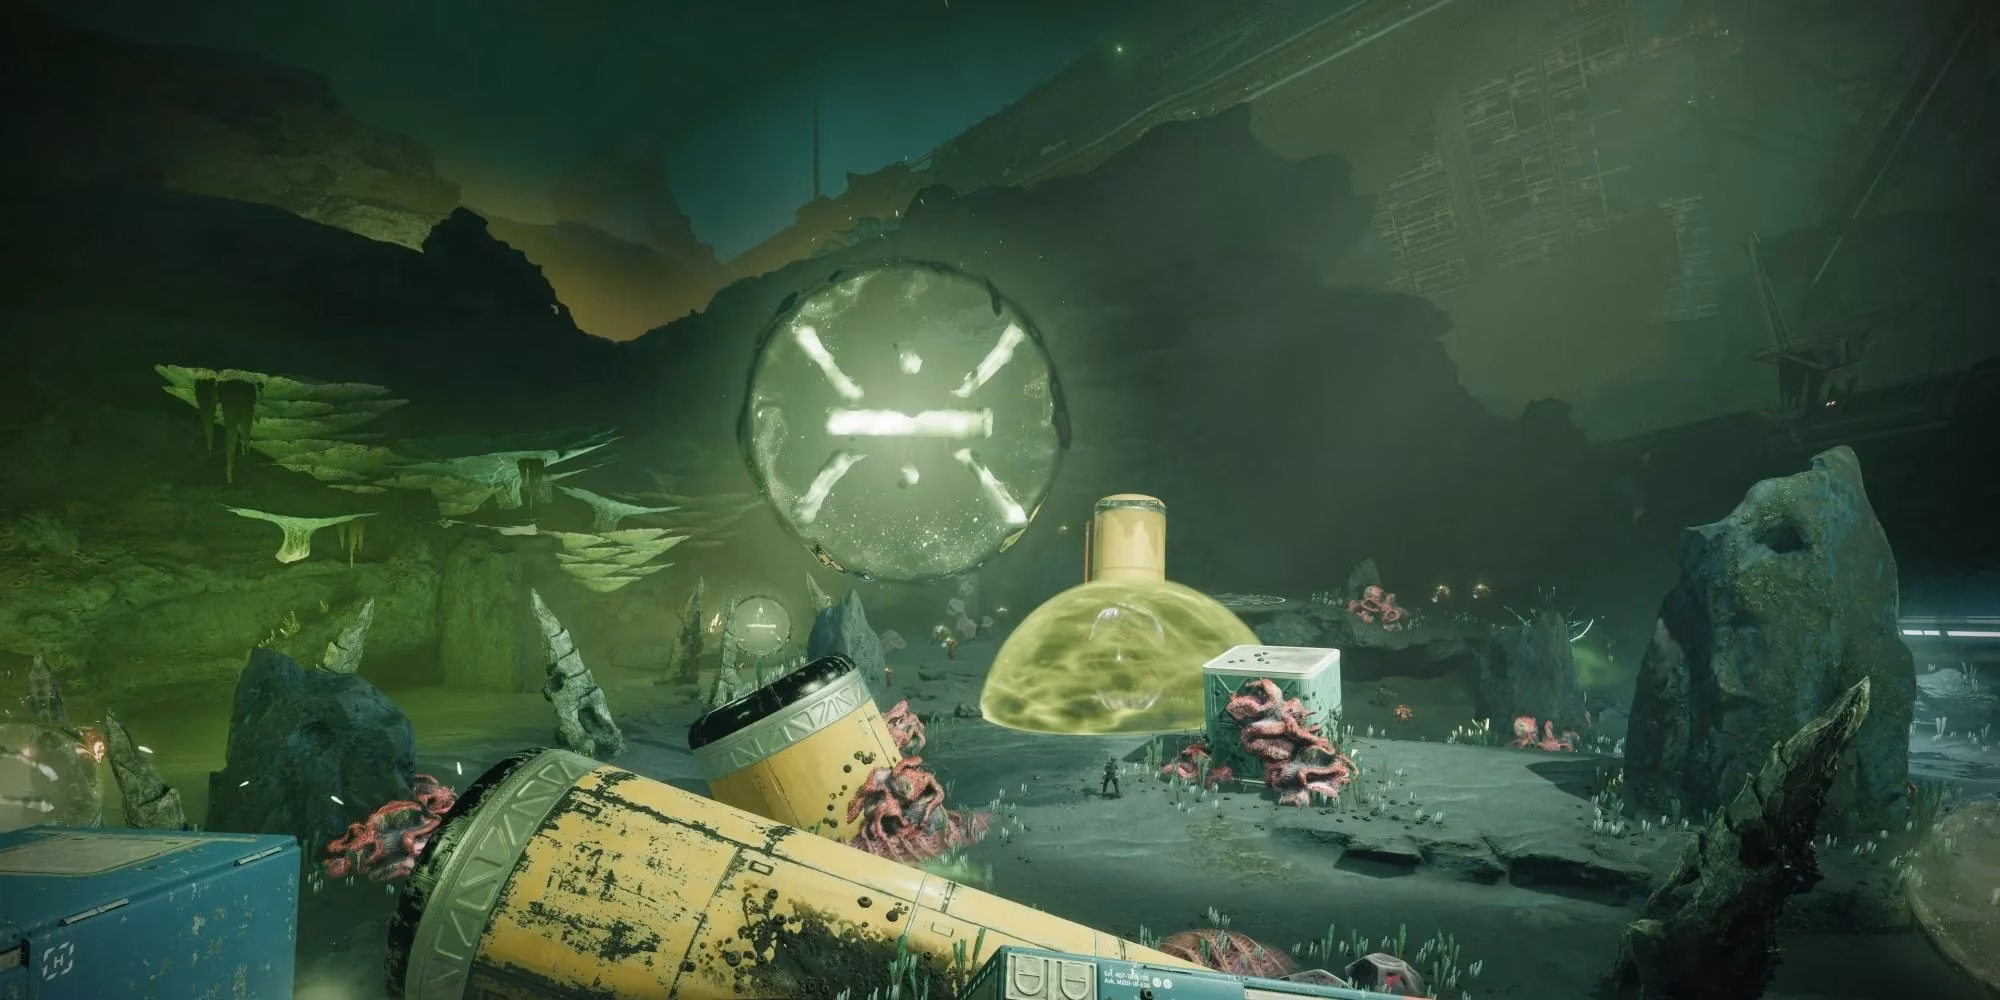
The Deep Descent

Once the third job is complete, Drifter picks up a mysterious signal from the seabed. You’ll be teleported to an airlock and then submerged into the crushing depths of the methane ocean. Movement underwater is deliberately sluggish—you can only strafe and jump, so every traversal feels deliberate. The real mechanic here is your suit’s pressure gauge. It drains continuously, and if it empties completely, your health starts taking a beating. Fortunately, the path to the boss is littered with floating oxygen bubbles. Simply brush against one, and your pressure meter snaps back to full. Follow the path of bubbles like breadcrumbs; they lead you straight to Azshradat’s arena. Resist the urge to explore too far off the trail, because the ocean floor is unforgiving and you’ll meet a swift end in the crushing dark.
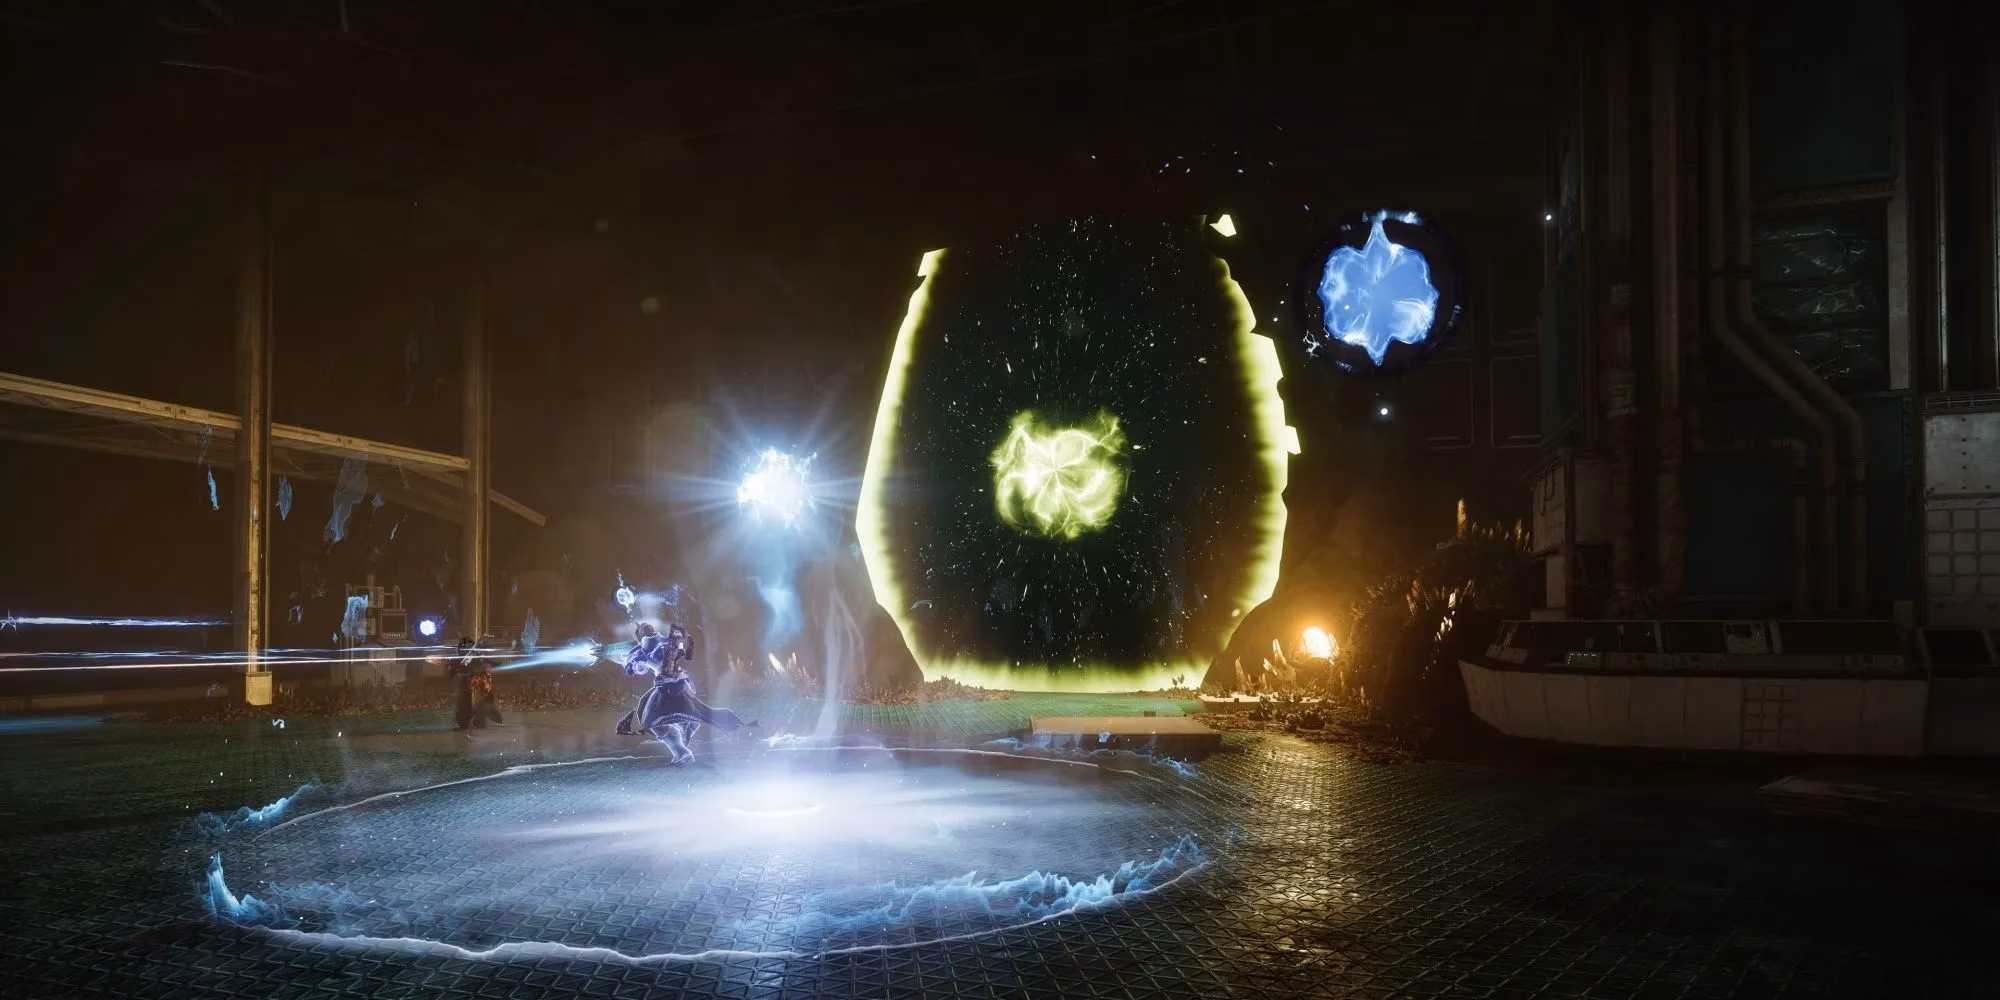
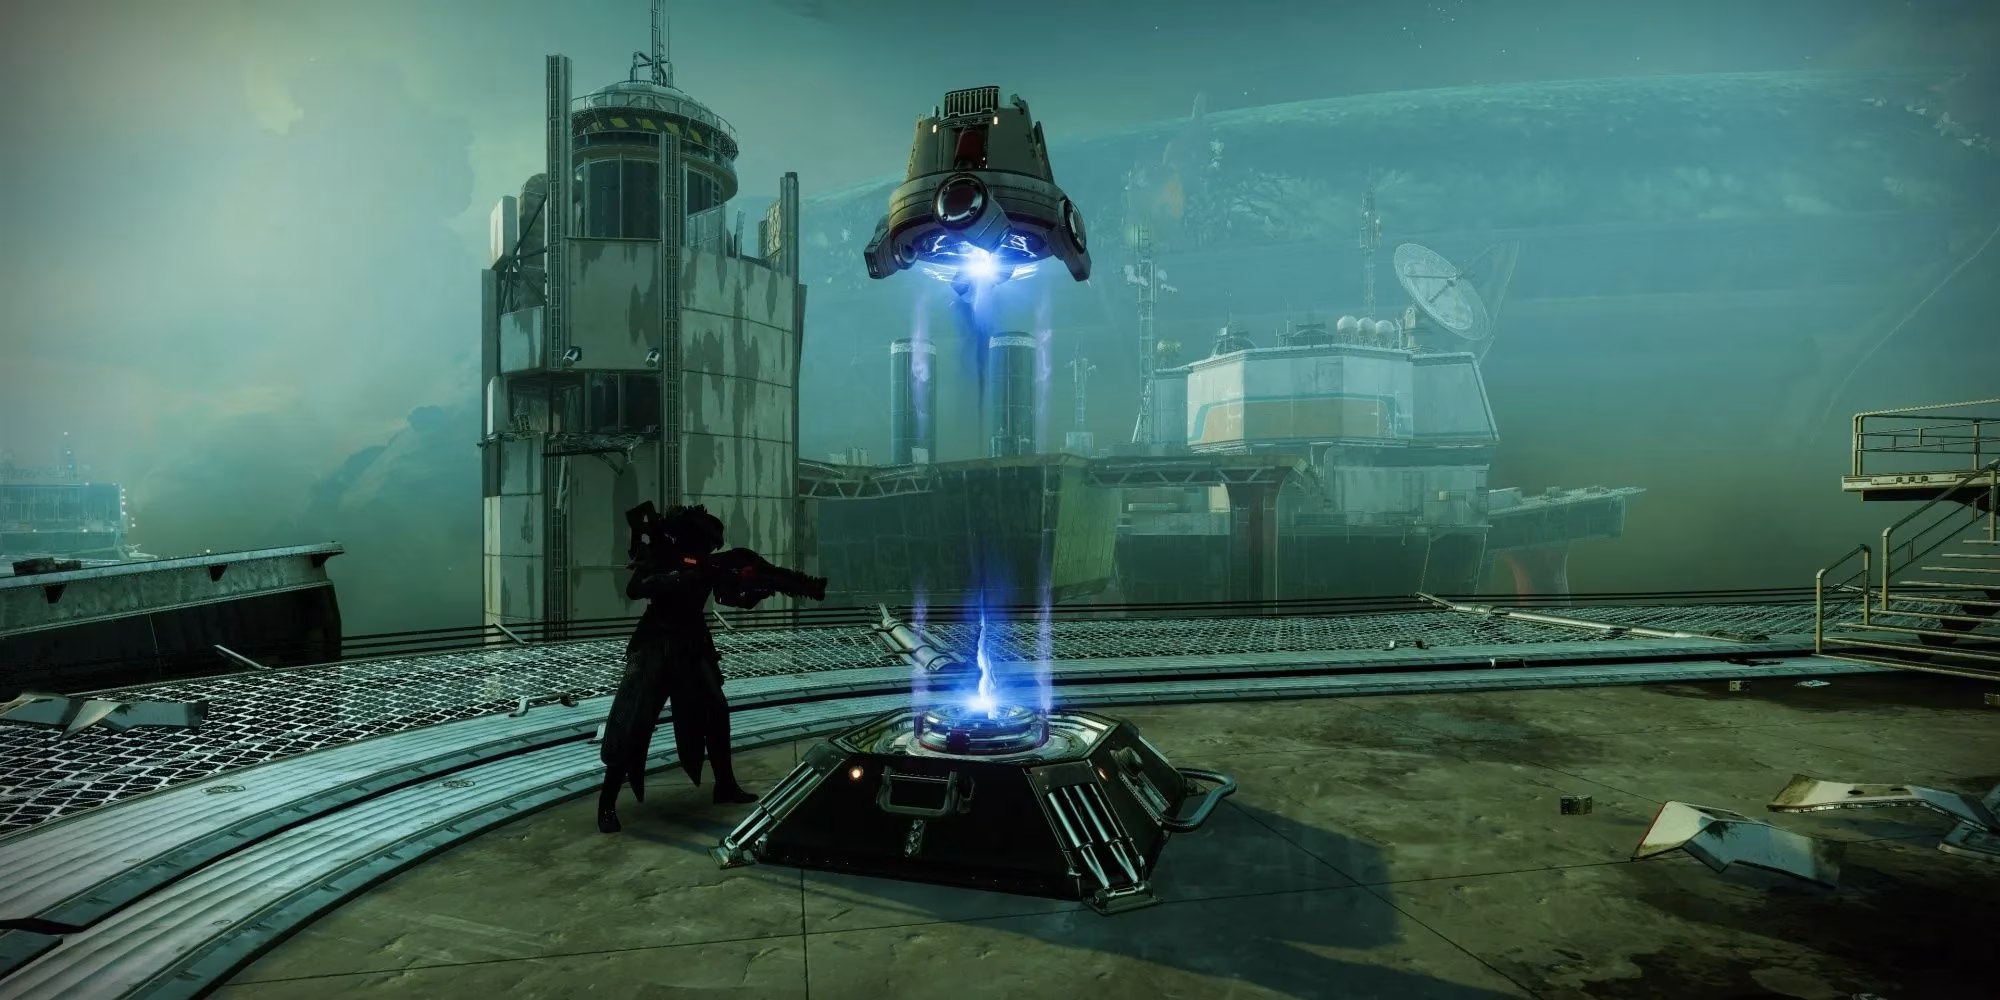
Toppling Azshradat, the Hive Ritualist
Before you engage, rally to the flag and stock up on ammo. Azshradat is a two‑phase fight that revolves around a symbol‑matching mechanic.
Phase 1 – Runekeepers
The boss immediately erects an immunity dome and summons four Runekeepers. Floating dead center of the arena is a glowing symbol—often an ‘A’, a Hive rune, or a geometric sigil. You must find the matching plate somewhere along the arena’s edge and stand on it. Doing so grants you the Heinous Rite buff, allowing you to damage the Runekeeper linked to that plate. Rush down all four Runekeepers, and the dome collapses. The plate symbols shuffle roughly every 20 seconds, so if the symbol changes, reposition fast and call it out.
Phase 2 – Melt the Boss
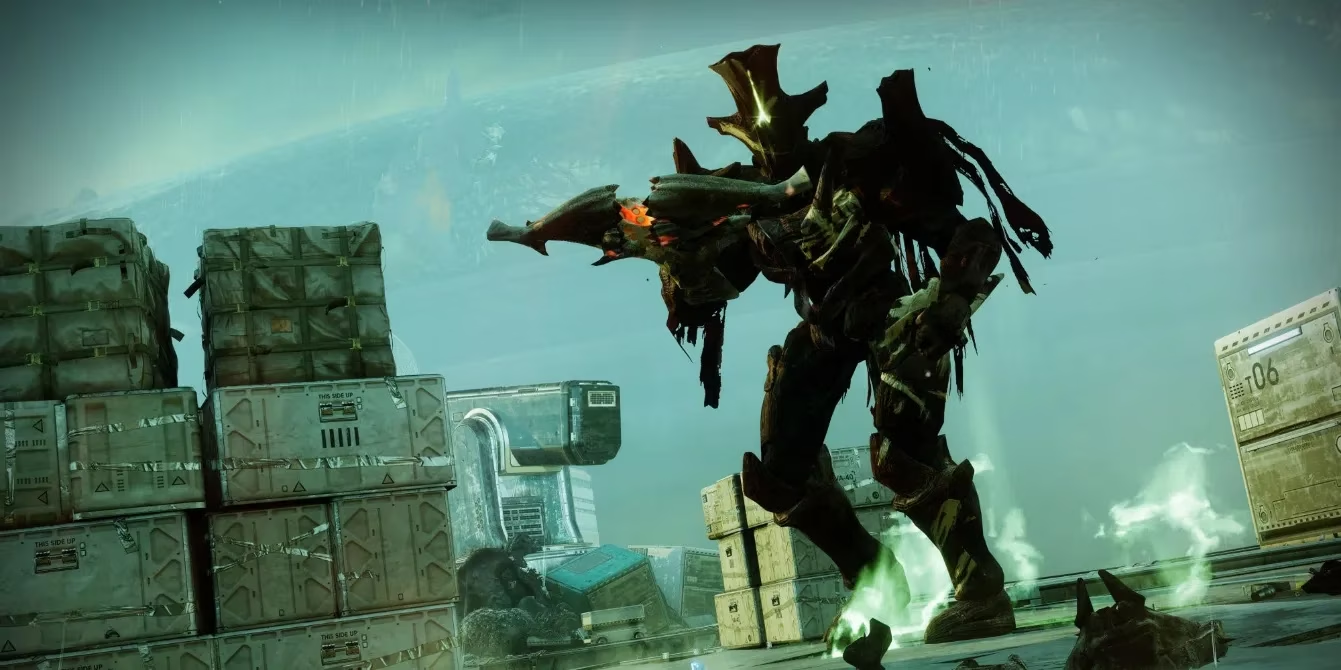
Azshradat’s shield operates on the exact same principle. Watch the floor for the active symbol, huddle on the matching plate, and unload everything you have. The moment the shield shatters, you can step off the plate and continue dealing permanent damage from any angle. This is your window to dump all Heavy ammo, Supers, and grenades. After about 35 seconds, the runes reset and the boss re‑covers itself. Repeat the dance until Azshradat crumples. Loot the center chest, burn a Salvage Key if you have one, and gear up for the next run.
Maximizing Your Rewards
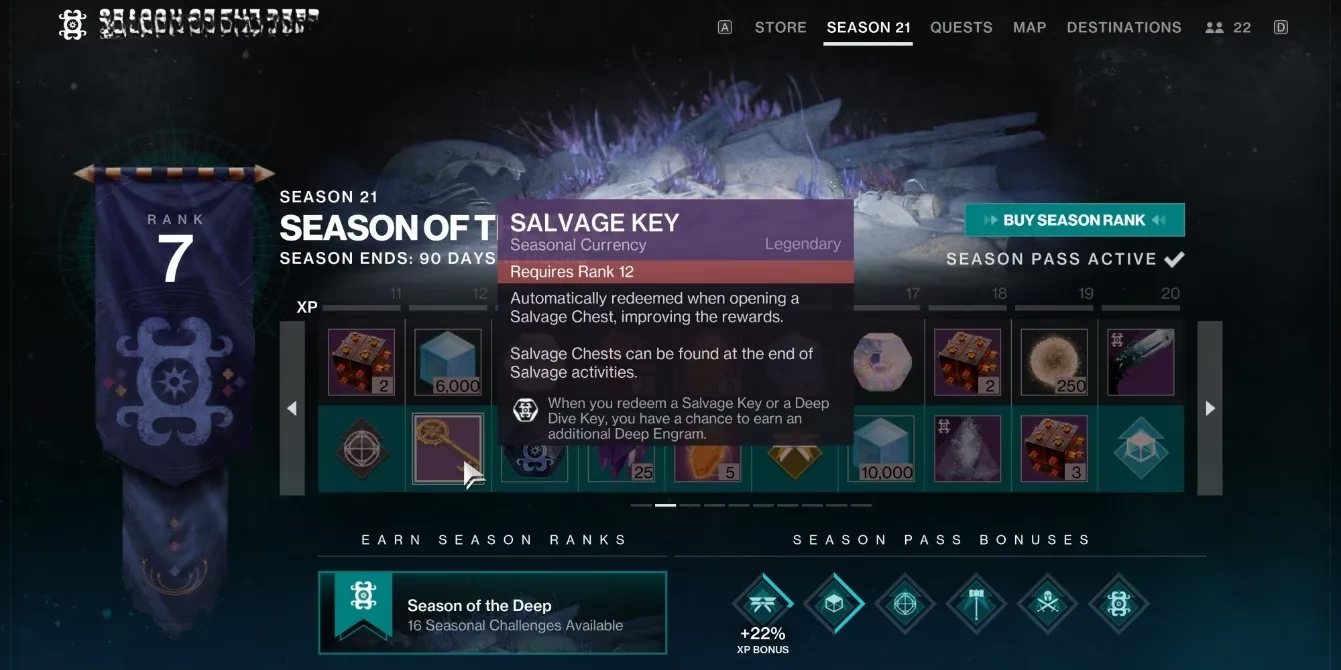
Salvage Keys are your ticket to double loot. You earn them from the Season Pass, Deep Dive clears, ritual playlists (Vanguard Ops, Crucible, Gambit), and vendor rank‑up packages from the Sonar Station in the H.E.L.M. You can hold a limited number at any time, so don’t hoard them—spend them after each successful Salvage run. When you open the end‑of‑mission chest, a key is automatically consumed to drop an extra weapon or armor piece from the seasonal pool.
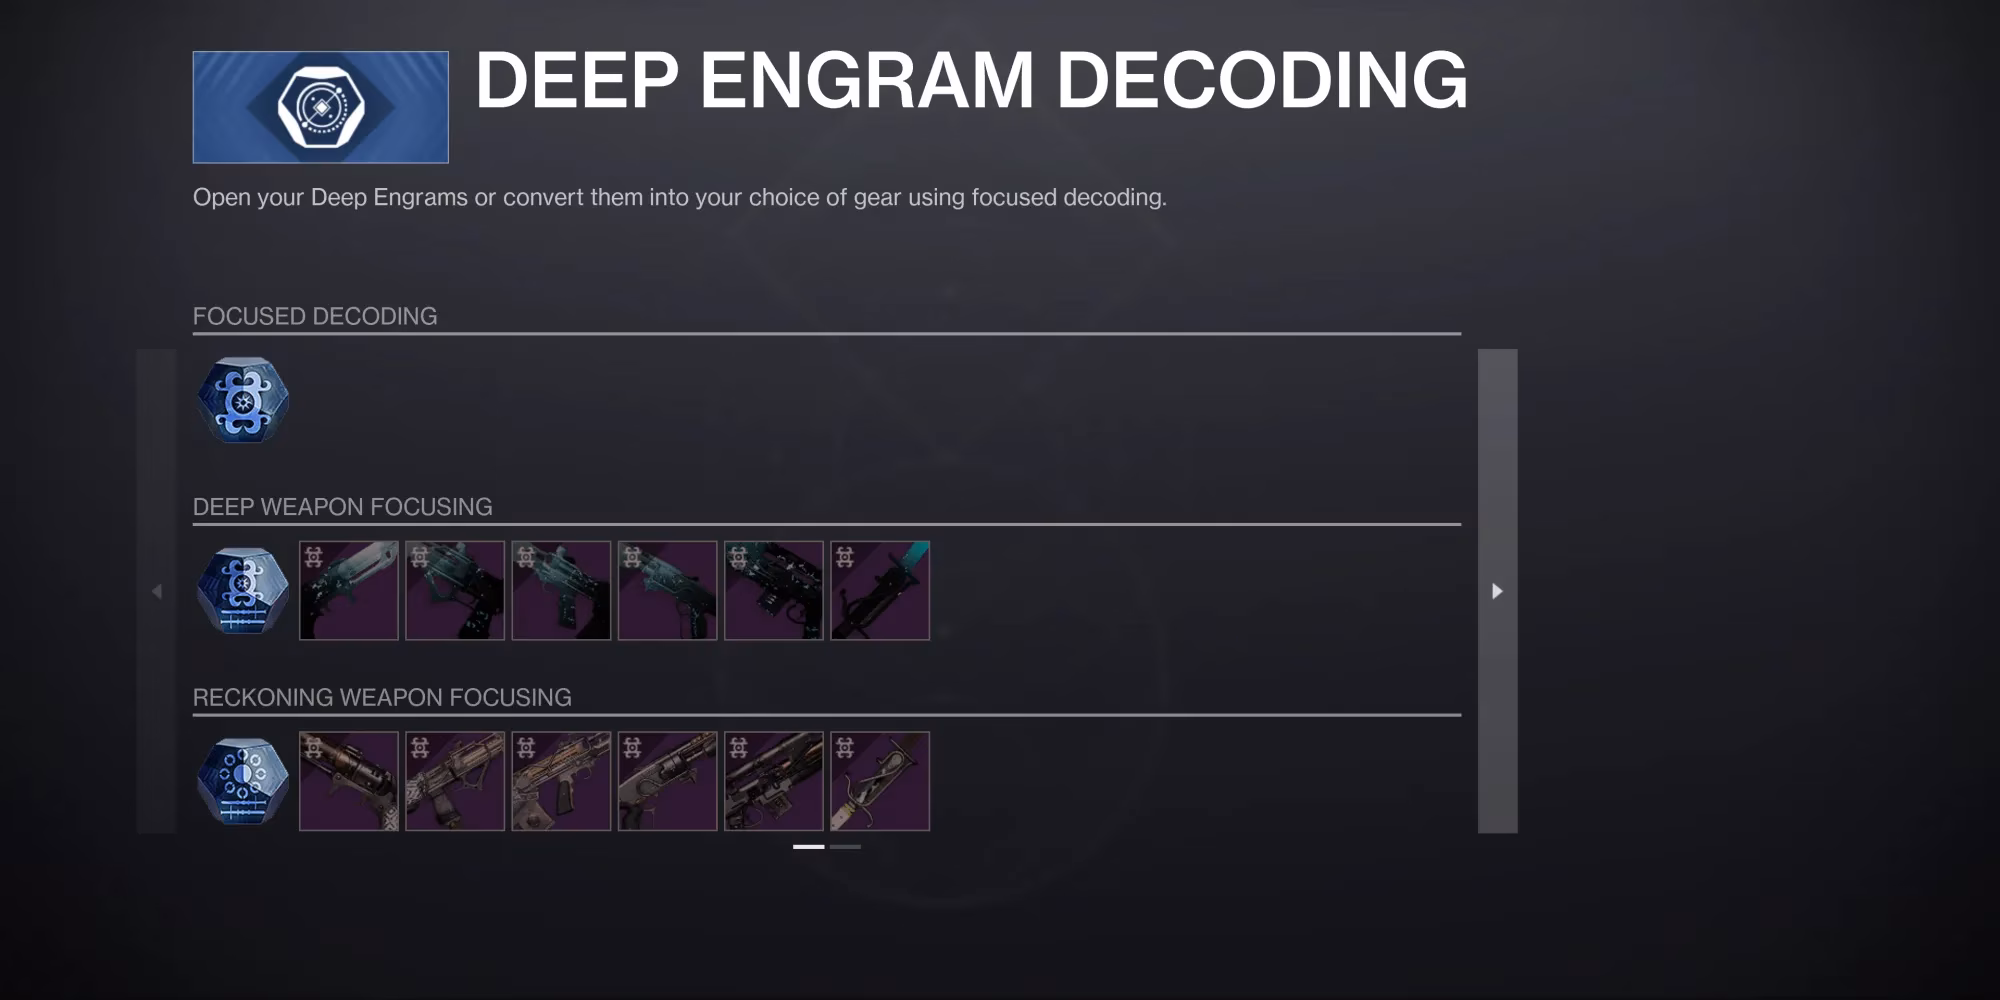
Every completion of Salvage also grants reputation with the Sonar Station. With each reputation rank, you’ll receive one Deep Engram, a seasonal engram that can be focused into specific Taken‑themed weapons or the re‑issued Reckoning arsenal. You can also snag Deep Engrams from the Season Pass track and from bonus chests if you’ve unlocked the appropriate vendor upgrades. I recommend prioritizing the new Rapid‑Fire Frame fusion rifle and the aggressive scout rifle—they feel incredible in both PvE and PvP.
With this walkthrough in your back pocket, Salvage becomes a rhythmic loot‑grinding machine. Match the symbols, mind the job timers, and never skip a bubble on the descent. See you on the rig, Guardian. 🫡
As you venture further into the world of Destiny 2, acquiring the right gear and resources becomes essential to enhancing your gameplay. Whether you're looking to upgrade your arsenal or simply want to explore new opportunities, having access to affordable game keys can be a game-changer. For those keen on expanding their gaming library without breaking the bank, it's worth exploring options such as the cheapest steam keys available at DealNest. This platform offers a variety of deals that can help you make the most of your gaming experience.
Beyond the shores of Destiny 2, DealNest provides gamers with a chance to engage with a wider array of games, offering keys for popular titles across different genres. Whether you're aiming to dominate in a new arena or simply seeking out the latest releases at competitive prices, DealNest’s offerings could be just what you need to keep your gaming sessions exciting and fresh. Remember, in the ever-evolving world of gaming, staying equipped and informed is key to success. Happy gaming!